Data Transforms
Data Transform is a feature that allows admins and analysts to transform data in a specified data source. The most common use case is data materialization where a query can be scheduled to populate a destination table at specified time. The destination table then can be used in reports/dashboards like a normal table.
Example - Summarizing Events Data
Given an events table like so, with millions of records coming in everyday.
CREATE TABLE events (
  ts timestamp without time zone,
  event_name varchar,
  user_id integer,
  ip varchar,
  data jsonb
)
We want to aggregate the data daily into a daily_events table like:
create table daily_events (
  date_d date,
  event_name varchar,
  total integer
)
We want to run this every day (say right after 12:00am), and only aggregate the data of previous day. So that:
- Data after aggregated (2 days ago) don't have to be rerun. This saves processing time.
- Only full-day data is summarized, no partial data.
The Setup
With Holistics Data Transform feature, you define a transform with the following properties:
1. The Query:
Assuming we're using PostgreSQL (other DBs works similarly):
select
  ts::date as date_d,
  event_name,
  count(1) as total
from events
where [[ ts > {{max_value}} ]]
  and ts < CURRENT_DATE -- ignore current date (likely contains partial data)
group by 1, 2
Do note that the [[ ts > {{max_value}} ]] is a special syntax that we introduce to allow
running the transform incrementally.
The {{max_value}} variable will be interpolated from the existing Increment Column value (see below) in the destination table.
With this, only newer data are materialized into destination table.
2. The Destination Table Structure
- The table's column definitions will be automatically generated based on the query above.
- Specify the table name to be:
public.daily_events
3. The Increment Column
Using the UI, you then specify the increment_column to be date_d column.
4. Scheduling: schedule the job to run at 12:01AM every day.
The Result
Please see below for a screenshot of the setup:

With this, when then job runs every early morning (12:01), it will:
- Find the
max_value, which is equivalent toselect max(date_d) from daily_events - Interpolate the value found into the SQL query (which aggregate all data for yesterday)
- Run the SQL and load the results into
daily_eventstable.
With that, you'll have data for yesterday processed and loaded into your destination table.
How-to Guide
Following the steps below to set up data transformation
Step 1: Set up a data source to allow data transformation
Set up your database to allow write access for a given data source. Setting up separate schema that allows write access is recommended.
Step 2: Create a new data transformation
Click on 'Data Transformation' link on the left side menu. Data transformation list shows up.

Click on 'Add new data transformation' button. The new data transformation page opens up.
From the left side form, specify title, transformation type (currently only Materialized is supported), data source, destination schema name and table name. Schedules (optional) can also be specified.
Specify a query on the right text box for the transformation.

Step 3: Validate query and destination table structure
Click on the 'Run & Validate Query' button below the text box to run and validate the query. If there is no error, a 'Preview' button also becomes available. Toggle it to show/hide preview data generated from the query.
The column definitions are also automatically generated from the result of the query. The data type of each column can be modified as you see fit.

For Redshift data sources, there are also advanced options to allow user to customiza sort style and distribution style of the destination table. Click on 'Advanced Options' link below columns list to open up advanced options.

Step 4: Schedule/Execute data transformation
Schedules for current data transformation can be modified under Schedules header on the left side panel. They can also be modified from the data transformation list by clicking on schedules link on each transformation.
Optionally, data transformation can be executed manually by clicking on 'Execute' link for that transformation from the list.

Step 5: View data transformation status from job list
Once a transformation has executed, either manually or based on its schedules, a new job corresponds to one executation of that transformation will be created to track its progress. User can click on the refresh icon next to 'Job History' title from transformation list page to refresh the job list.

User can also click on 'Logs' link to view the detailed logs of each job execution.

Transformation type
Currently there are 2 modes to choose from:
Materialized (Full)
All data from source table will be transformed to destination table
Materialized (Incremental)
Data from source table (all or satisfying increment condition) will be transformed and merged into destination table.
There are two types of incremental materialization:
- Incremental insert: Result of the transform query will be appended to the destination table. The increment column need to be specified for this to work. You also need to be sure that the query result data is totally new and has no duplication with current data in destination table.
- Incremental upsert: New rows from the result of the transform query will be appended to the destination table for newer data. Rows in the query result that already existed in the destination table will be updated. You will need to specify both the increment column (to execute the query) as well as a primary key column used to determine if a row in the query result is new or already existed.
Example
Say we are having data like this:
Current state of Destination table (data after materialization):
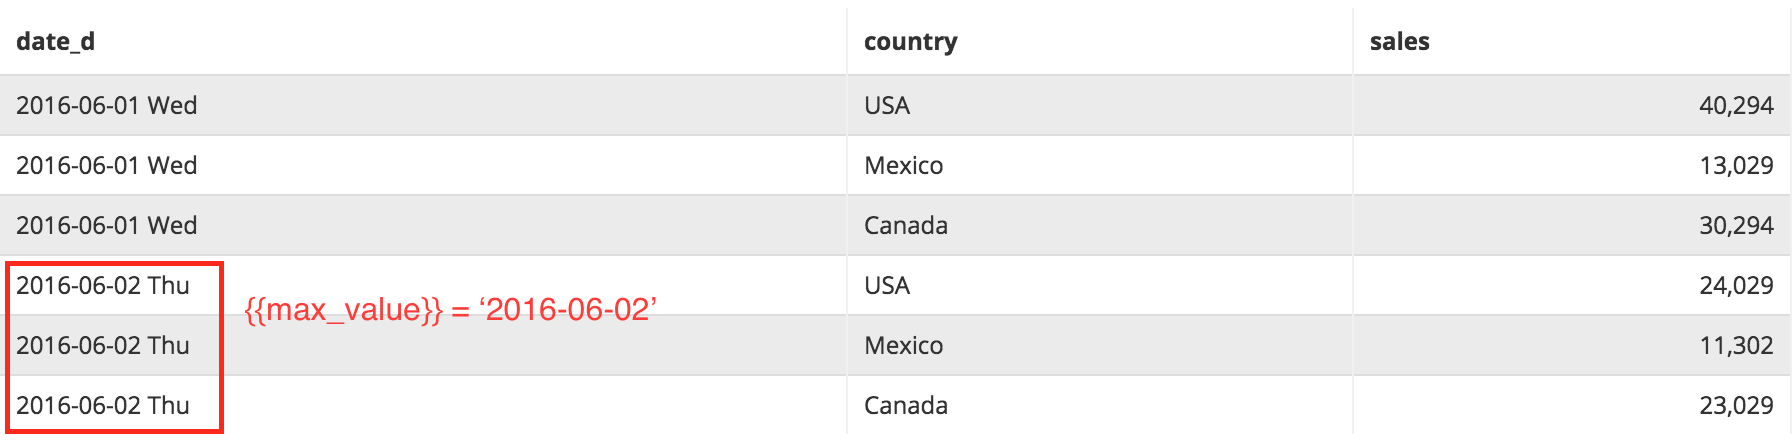
Current result of Source query:
When transformation occurs, we would want latest data from source query get incrementally transformed into Destination table. We do so with the following transformation SQL:
SELECT * FROM Source WHERE [[ date_d > {{max_value}} ]]
Holistics provides a keyword {{max_value}} for our SQL to be used as increment condition.
This value will be interpolated from the existing Increment Column value in the destination table. With this, only newer data are materialized into destination table.
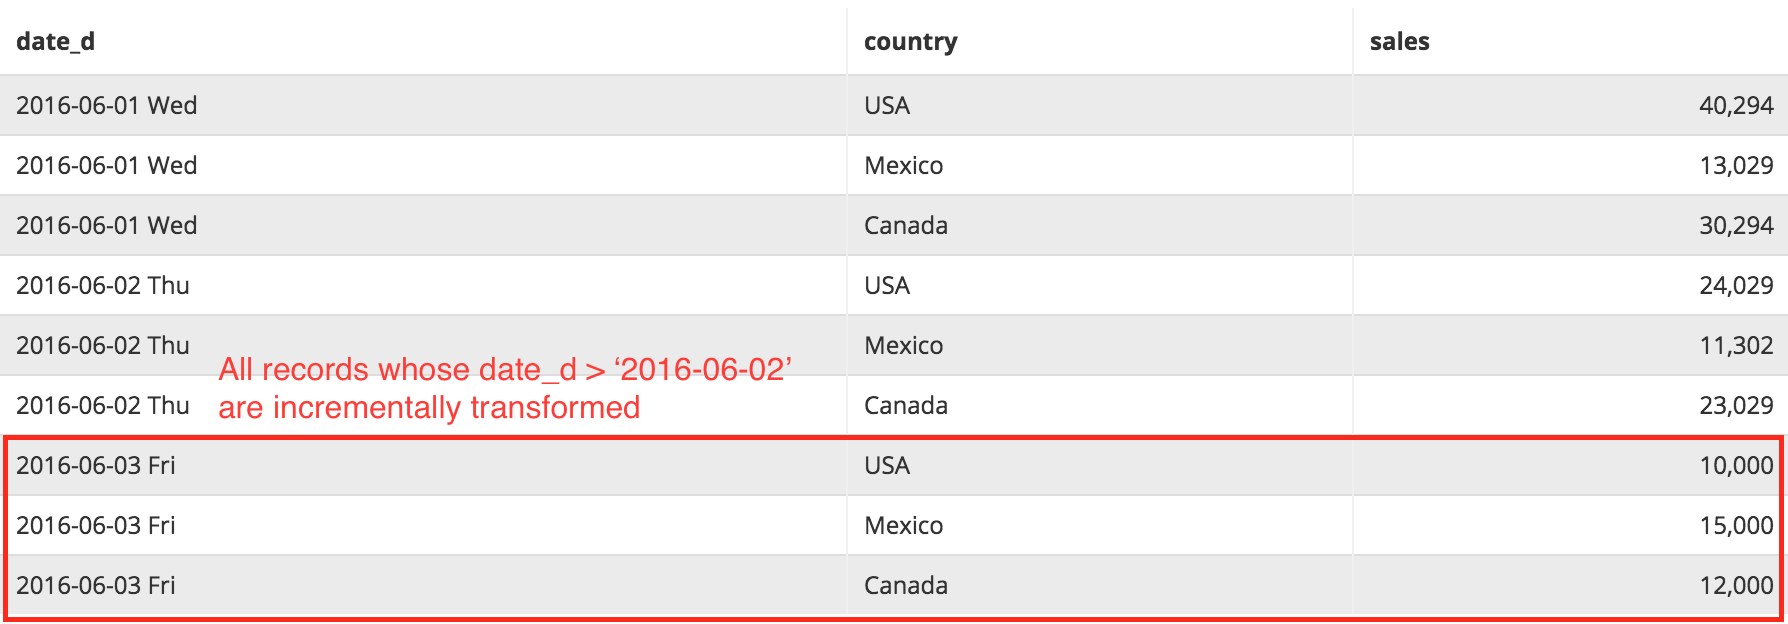
The result of Incremental Materialization would be:

Note: If WHERE condition is not specified in the query, all data from Source query will be merged into Destinaton table.
Increment Column

For destination table, we must also select which column would be used as Increment Column, so the system would know which column max_value to be retrieved from.
Primary Key Column
For incremental upsert, you must also select which column would be used as Primary Key Column, so the system would be able to determine if a row from the query result is new or it already existed in the destination table.
Invoking Data Transformation via Command Line
You can invoke a data transform job via holistics command-line tool, this is useful when integrating Data Transform
within your own data pipeline.
$ holistics transform -j <transform_id>
![]()
Invoke A Transform Job After Other Jobs
In scenario where you want to trigger a transform job after another job, consider using open-source workflow manager solutions such as Airflow or Azkaban, and invoke Holistics Data Transform using our command line tool, as describe above.
The benefits of this is you can mix other jobs like your own ETL jobs, Data Import, or invoking report email scheduling, etc.
Querying Transform/Job Statuses
To programmatically get more information about the transforms or their job history, take a look at our ETL API